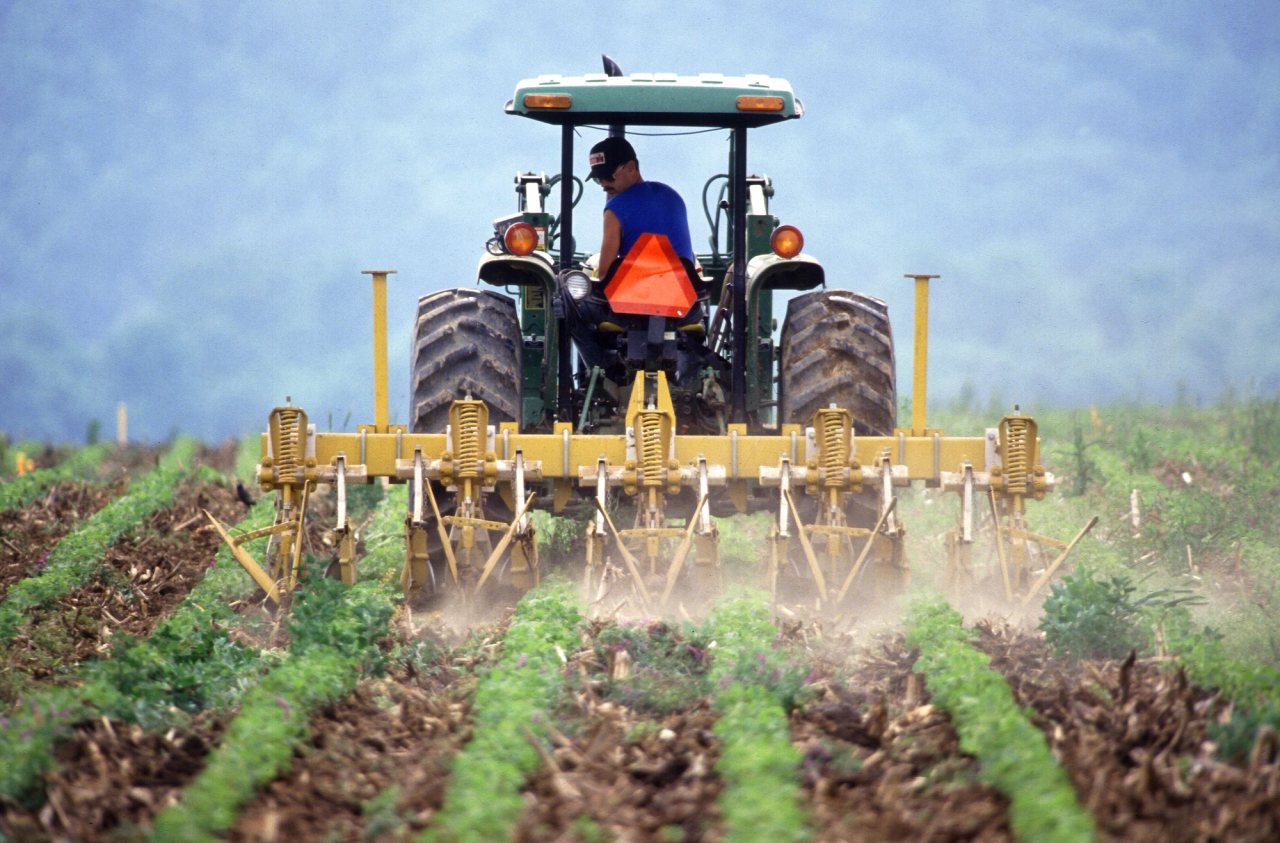
A bed can look clean on planting day and still become the hardest job on the farm six weeks later. The tarp worked. The crop emerged. Then rain delayed cultivation, harvest took the crew elsewhere, and a second flush of weeds found the open ground. Often the missing piece is the next operation.
A useful weed plan carries you from the previous crop through the next one. It gives a vulnerable crop time to establish, keeps new weeds within reach of your tools, and reduces the seed and root reserves that create future work. On a diverse farm, that sequence will differ between carrots, transplanted squash, orchard rows, and a block of grain. You can use the same planning questions without forcing every acre into the same treatment.
This is Part 3 of Soil Health Across the Whole Farm. Part 1 considers the design of farm diversity; Part 2 follows water across the farm. Here we put those ideas on the work calendar. Part 4 connects that calendar to beneficial insects.
Start with the weeds that cost you the most
Choose one area where weed control repeatedly takes too much labor or reduces the crop. Walk it before making the next planting decision. Identify the two or three dominant weeds, check whether plants are emerging from seed or returning from underground parts, and mark the patches. Photograph unfamiliar plants with their leaves, stems, and roots visible; use your extension weed guide or ask for an identification. A familiar common name can hide a different species with a different weakness.
Annual seedlings and established perennial weeds need different plans. Bindweed, quackgrass, and nutsedge can return from underground organs after their tops disappear. Repeatedly cutting or fragmenting those organs without an effective follow-up can leave a continuing problem. Match the control sequence to the species and reserve enough time to repeat it. A brief clean surface is a poor test of perennial control. [1]
Write down the problem before choosing the tool
| What you find | What it changes in the plan |
|---|---|
| Small annual weeds emerging with the crop | Create a preplant flush where feasible; reserve a timely, crop-safe follow-up. |
| The same perennial patch returning after every pass | Map it separately and plan sustained control; avoid moving contaminated soil into clean beds. |
| Weeds concentrated in planting holes, bed shoulders, or drip leaks | Fix the opening or water pattern; whole-field treatment may miss the cause. |
| Weeds mainly after harvest | Assign cleanup and the next cover before that crop leaves the field. |
| Weeds arriving from mulch, equipment, or a boundary | Investigate the source as well as the plants already growing. |
Keep soil observations alongside weed observations. Surface sealing, a leaking line, or a thin crop stand may help explain where weeds gain ground. A weed species alone cannot diagnose a nutrient deficiency or tell you which amendment to buy. Use our guide to what weeds can tell you about soil to separate a useful clue from a diagnosis.
Protect the crop when competition matters most
Young, slow-growing crops need an early advantage. The critical period for weed control varies with crop, planting method, weed pressure, and conditions; there is no farm-wide rule that every crop needs the same number of clean weeks. Carrots and onions leave the ground open much longer than a vigorous transplant that quickly shades its row. Local crop guides can help you identify the sensitive period. [2]
Work backward from planting. Put the preparation date, planting date, first weed check, first likely control opportunity, and a backup on the same calendar. Give those jobs an owner. If the first small-weed window is likely to collide with your busiest harvest, choose a more forgiving preparation method, shift a planting where the market allows, or reduce the area you are testing. A system that needs perfect timing every week may exceed the farm’s capacity.
Later in the season, your reason for intervening may change. A weed that no longer threatens yield can still obstruct harvest or replenish the seedbank. Record those as separate problems. This helps you avoid spending equal effort on a harmless-looking corner and a small patch of a prolific weed that is about to shed seed.
Give the crop a clean start that you can maintain
Use a stale seedbed when the schedule has room
Prepare the seedbed ahead of planting, allow a flush of weeds to emerge, and remove that flush with as little fresh soil disturbance as practical. Soil moisture and temperature have to support germination; an extra week of dry ground may produce very little flush. Reworking the bed deeply afterward brings more seeds into a position to germinate and can undo part of the benefit. [3]
For a slow-emerging direct-seeded crop, a trained operator may use a suitable flame-weeding operation before crop emergence. Inspect the actual seed row closely; the calendar alone is not an emergence check. Flaming after the crop emerges can destroy it, and grass growing points may survive treatments that kill small broadleaf seedlings. Follow equipment instructions, fire restrictions, and safe operating conditions. Choose a non-flame option around dry residues or other ignition hazards. [1]
Use a tarp to fit a real gap between crops
Opaque tarps suppress growth by excluding light; clear-plastic solarization relies on heating and has different weather requirements. With either approach, ask how the material will be anchored, moved, dried, stored, and reused. Check where rain leaving an impermeable tarp will flow. Smaller sections can be easier to handle, but create more edges to secure. These details belong in the labor and water plan. [4]
Research in New York and Maine found that black tarps applied for at least three weeks reduced weed biomass in most site-years and helped reduced-tillage and no-till beets perform comparably to conventionally tilled beets. Longer durations did not consistently add benefit. That supports trying tarps where the crop calendar fits; it does not establish a universal three-week treatment for every temperature, residue load, or weed. [5]
Inspect beneath several parts of the tarp before committing to planting. Look for living shoots, surviving crowns, damp or dry patches, and residues that will obstruct your seeder. If perennial shoots return or the crop cannot be planted reliably, revise the sequence. Tarps prepare a starting condition; they do not leave a protective mulch after removal. Have the next weed-control step ready.
Choose cover and cultivation together
A mulch can block light, conserve surface moisture, and reduce the area needing cultivation. It can also interfere with seeding, slow spring warming, harbor crop pests, or consume more handling time than expected. Trial the actual material in your crop and season. Inspect its weed seed content and ask about its source before bringing a large load onto the farm. Clean equipment before leaving heavily infested ground, and scout the edges from which seeds or root fragments can spread. [2]
Fit the surface cover to the job
| Approach | Where to consider it | What to check before expanding |
|---|---|---|
| Straw or other plant-residue mulch | Established transplants or appropriate perennial systems | Weed contamination, depth and gaps, water reaching roots, slugs, and handling time. |
| Reusable synthetic mulch or fabric | Plantings where holes and removal can be managed | Escapes in holes and edges, anchoring, irrigation, recovery labor, and disposal. |
| A terminated cover crop | A window long enough to grow and terminate useful biomass | Stand uniformity, termination stage, regrowth, planting equipment, and crop nitrogen supply. |
| Living cover in an alley or selected strip | Space where you can control its competition and spread | Water demand, mowing access, invasion of the crop row, and crop growth nearby. |
| Shallow cultivation of exposed soil | Rows whose crop stage and layout allow selective work | Weed size, soil moisture, forecast, crop injury, and whether weeds reroot. |
A cover crop is easiest to manage when its exit is planned before sowing. A roller-crimper needs a suitable crop and growth stage; an immature stand may recover. Residue amount and planting equipment matter as much as whether the field is described as no-till. The eOrganic guide to roller-crimper systems explains why species, maturity, biomass, and the following cash crop have to line up. [6]
Living cover deserves particular care in a dry period or beside young perennial plants. Put it where you can mow or suppress it and observe its effect on the crop. Reduced evaporation under cover does not erase the water used by living plants. Our living-mulch guide and water-conservation guide help you assess that trade-off before you put a competitive cover beside a vulnerable crop.
What the newer research changes
In a four-year New York cabbage–winter squash experiment, no-till with tarping required up to 41% less preharvest labor than no-till without tarping, but still more than conventional tillage. Its profitability was comparable to conventional tillage. Compost mulch raised yields without raising net returns over no mulch; repeated heavy applications also accumulated substantial soil phosphorus. Treat compost as a nutrient input with a soil-test budget, even when your immediate goal is weed suppression. [7]
A 2026 paper from one Quebec field offers a useful combination to consider. Across two seasons, flail mowing followed by tarping produced 38% more total broccoli yield and 44% more total beetroot yield than roller-crimping. However, crimping occurred too early for effective termination, the crops were transplanted, and tarping performed similarly to mowing plus disking. Weed cover did not explain the yield pattern well; nitrogen availability was a likely contributor. The covers also did not compensate for reduced fertilizer. [8]
Let rotation change the timing of weed pressure
A meta-analysis of 54 studies found 49% lower weed density in diversified rotations than in simpler rotations. Weed biomass was not significantly lower overall, so fewer weeds did not necessarily mean proportionately less growth. Variation in planting dates was especially useful for explaining suppression. The studies concerned annual cropping systems, not a prescription for orchard or vineyard floors. [9]
For planning, look beyond the names on the rotation chart. Does the next crop move the sowing date? Close its canopy sooner? Allow mowing? Leave a useful cover-crop window? Or does it repeat the same open-ground period and the same missed cultivation? A different vegetable family can be valuable for other reasons while still giving the same weeds a familiar opportunity.
Use a demanding crop as the test of the sequence. If carrots repeatedly need rescue weeding, put them after the part of your rotation that leaves the lowest weed burden you can achieve. A preceding crop that earns slightly less may still be useful if it reduces a major labor bottleneck. Compare the contribution of the whole sequence using your own sales and costs. Our rotation guide develops the wider crop and soil considerations.
Plan the cropped ground and insect habitat together
Here is the shared planning approach we suggest for this series: mark the crop area that needs protection, the ground temporarily being prepared for the next crop, and the managed habitat you intend to keep through that transition. Then give each area its own job and maintenance date. This is Soil Health Exchange’s synthesis of established practices. We have not tested the complete arrangement as a treatment or established an ideal layout.
For example, a grower could tarp a harvested bed while maintaining a separate flowering strip nearby, then establish the next crop without needing to leave troublesome weeds in its row. Habitat guidance already emphasizes continuity of food and shelter for natural enemies. The useful addition here is to put that continuity on the same sheet as weed-control deadlines, labor, and crop scouting. [10]
One transition, three areas to manage
| Area | Job during the transition | Reason to change the plan |
|---|---|---|
| Crop bed or row | Keep competition low while the crop is vulnerable; scout pests and useful insects. | Weeds escape the planned tool, crop growth slips, or pest pressure reaches the crop’s action point. |
| Ground between crops | Remove crop residue as needed, manage weeds, and prepare for the next planting. | Regrowth persists, soil is unfit for planting, or the delay threatens the planting window. |
| Selected habitat strip or margin | Maintain useful bloom or shelter while controlling problem weeds and crop pests. | The strip becomes a seed source, harbors a relevant pest, or competes with the crop. |
Weed-seed predators offer an additional possible benefit, but their activity varies by species, place, and timing. Do not let a serious weed shed seed in expectation that beetles will clean it up. Preventing seed return remains a job you can control directly. The eOrganic seed-predation guide discusses how to weigh habitat and postharvest management together. [12]
In an orchard, the same drawing might separate the young-tree row from a managed alley and a longer-lived boundary planting. In a large field, it might distinguish the cropped block, a cover-crop phase in the rotation, and a field margin accessible to machinery. Avoid assuming that an annual vegetable-bed treatment can be copied around established tree roots. Part 4 explains how to choose and inspect the habitat component.
Give every promising practice a fallback
When the first plan falls short
| Field signal | A practical response to consider |
|---|---|
| Tiny weeds survive a cultivation pass | Stop and inspect tool depth, alignment, weed stage, and crop injury before doing the whole area. |
| Wet weather closes the cultivation window | Recheck weed size; switch to a suitable alternative or prioritize hand removal in the most vulnerable crop. |
| Weeds emerge through mulch or planting holes | Correct gaps and remove escapes early; include this follow-up in the cost of the mulch. |
| Perennial shoots reappear after tarping | Return to species-specific sustained control; do not read a temporary top kill as eradication. |
| Cover-crop regrowth competes with transplants | Use the planned termination backup while the crop can still be protected. |
| Flowers and problem weeds mature together | Remove the problem weeds selectively where practical; protect useful habitat only while it remains manageable. |
| A clean bed takes too much time or reduces harvest | Revisit the area, timing, or combination rather than judging the method on appearance alone. |
Count the whole job, including the crop you could have grown
Compare total added costs with labor savings and the change in marketable harvest. Include setup, movement, repairs, cleanup, storage, irrigation changes, and land occupied by a tarp or cover. Track materials over their useful life. If a treatment delays a saleable crop, include the contribution margin you lose: expected revenue minus the production costs you avoid. Gross sales alone overstate that opportunity cost.
Keep a comparison area under your usual management, as similar as you can make it in crop, planting date, soil, and previous weed pressure. Mark a few repeatable observation spots. Record weed species and counts in the same area, control minutes, crop stand, and marketable harvest. A single pair of beds can teach you about handling and timing; it cannot establish a reliable treatment effect. Repeat across plantings or seasons before making a large commitment.
Keep the organic plan practical and current
For certified organic farms, the federal standard starts with preventive management and permits specified physical, mechanical, and biological approaches. Inputs used when those practices are insufficient must meet the applicable organic requirements, with the conditions for use documented in the organic system plan. Synthetic mulches must be removed at the end of the growing or harvest season. Check a specific product or material with your certifier before use; a general marketing claim is not that approval. [11]
Your next useful move
Choose one problem area and write down five things: the weed you are targeting, the crop’s vulnerable period, the preparation method, the first follow-up, and the fallback. Add the person doing each job. Mark any nearby habitat you intend to retain and how you will keep it from becoming another source of weeds. Then start a short labor and harvest record. That is enough to turn the next season into a better-informed decision.
Download the two-page field worksheet to plan one crop area and record weeds, habitat, pest pressure, labor, and harvest results. You can type into the PDF or print it. The worksheet is our planning aid, not a validated sampling protocol.
Continue with Part 4: Beneficial Insects—Identify Them, Support Them, and Check Their Work. It shows how to connect flowering plants and refuge with what is actually happening on the crop.